
Clearing a Property Before Renovation: Step-by-Step Guide
November 19, 2026
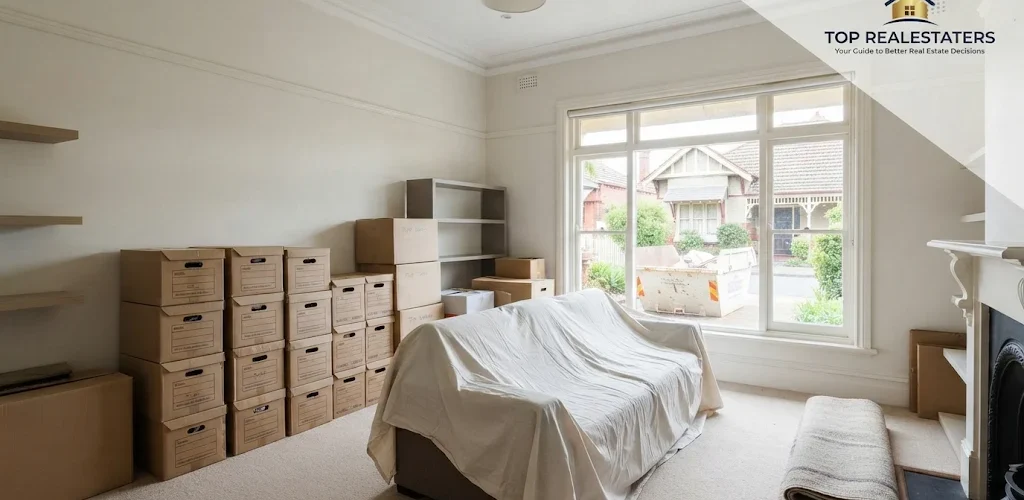
Everyone loves the exciting part of a renovation: the new kitchen, the fresh paint, the light-filled rooms. Almost nobody loves the part that comes first, which is dealing with everything already inside the building.
Old furniture, forgotten boxes, broken fittings, garden junk. It all has to go somewhere before work can start. And if the clearing is rushed or badly planned, it can delay your builders, add costs and cause stress before the project has even begun.
This guide walks through how to clear a property sensibly, from sorting belongings to preparing the empty shell for the renovation team.
Why Clearing Comes First (and Why It Deserves a Plan)
Builders, electricians and plumbers need space to work. Furniture in the way slows them down, and belongings left in rooms can get damaged by dust, debris or moisture.
A proper clearout also gives you something valuable: a clear picture of the building. When rooms are empty, you can see cracks, damp patches, worn floors and awkward layouts that were hidden behind furniture. That information helps you and your contractor plan more accurately.
The key is to treat clearing as a mini-project of its own. A simple plan, a realistic timeline and a bit of organization will save you from last-minute scrambles.
Step 1: Walk Through and Make a Plan
Before lifting a single box, walk through every room, including the loft, basement, garage, garden shed and any storage spaces. Note what’s there and roughly how much of it there is.
A simple room-by-room list works well. For each room, write down:
- Large furniture and appliances.
- Boxes, books and personal items.
- Fixtures that will be removed during the renovation.
- Anything fragile, valuable or sentimental.
- Anything that looks hazardous.
Then set a timeline. Work backward from your builder’s start date and leave extra days for delays. Clearing nearly always takes longer than people expect.

Step 2: Sort Everything Into Four Groups
The easiest way to stay organized is to sort items into four simple groups.
- Keep. Items you want in the finished home or in storage.
- Sell or donate. Furniture and items in good condition that someone else can use.
- Recycle. Metal, cardboard, electronics, glass and other materials that can be recycled locally.
- Dispose. Broken or unusable items that must be thrown away.
Be honest about what you keep. Renovations are a perfect excuse to let go of things you haven’t used in years. A good question to ask is whether you would buy or move this item again today.
Use clear labels and, if possible, separate zones in the house or garden for each group. It prevents the “I’ll just put it here for now” pile that never goes away.
Step 3: Protect What You’re Keeping
Valuables, documents and sentimental items need special care. Renovation brings dust, noise and sometimes unexpected moisture or breakage.
- Move important documents, jewelry, electronics and family keepsakes to a safe place away from the site.
- Use sturdy boxes, label them clearly and keep a simple inventory.
- Wrap fragile items such as mirrors, art and glassware properly.
- Consider short-term storage if the property will be empty for a long time or if you don’t have a safe spot.
- Check your insurance policy and ask whether stored or stationary items are covered during the works.
If you plan to leave large pieces in place, cover them well with thick dust sheets and keep them away from areas where work will take place.

Step 4: Handle Waste Responsibly and Legally
Renovation clearing can produce a surprising amount of waste. Plan how you’ll remove it before it piles up.
Common options include:
- Skip or bin hire. Useful for large volumes. Check whether you need a permit if it will sit on a public road.
- Waste collection services. Professional clearance companies can sort and remove items for you.
- Local recycling or waste centers. Good for smaller amounts or specific materials.
- Donation and resale. Charities and online marketplaces may take furniture and appliances in good condition.
Rules about waste, hazardous items and disposal differ widely by country and city. Ask your local authority what’s allowed and what needs special handling. If you hire a waste carrier, check that they’re properly licensed and can explain where the waste will go.
Step 5: Watch for Hidden Hazards, Especially in Older Properties
Older buildings can hide materials and conditions that need extra care. These may include old insulation, ceiling or floor materials, wiring problems, mold, pests or structural weaknesses.
You don’t need to panic, but you do need to be careful.
- Don’t break up or drill into old materials if you’re unsure what they are.
- Look out for damp, mold, strong odors, exposed wires and unstable floors or ceilings.
- If the property was built long ago, ask a qualified professional whether testing is advisable before demolition or heavy work starts. Requirements differ by location.
- Wear sturdy gloves, boots and a suitable mask when clearing dusty spaces, and keep children and pets away.
If something looks unsafe, stop and get expert advice. It’s much cheaper and safer to check first than to fix a mistake afterward.

Step 6: Strip Out, Disconnect and Prepare the Space
Once the loose items are gone, it’s time to prepare the building itself. Depending on your project, this might include:
- Removing fixtures. Old cabinets, carpets, curtains, shelves and fittings.
- Shutting off or capping utilities. Water, gas and electricity should only be handled by qualified professionals.
- Protecting areas that stay. Cover floors, staircases and doors with protective sheets or boards.
- Securing the property. Make sure doors and windows lock, especially if the home will stand empty.
- Agreeing access. Provide keys, parking arrangements and a point of contact for the contractor.
It’s worth walking the empty property with your builder before work begins. Agree what’s staying, what’s going and what they expect to find on day one.
Step 7: Clean Up and Hand Over to Your Renovation Team
A final tidy before the builders arrive helps everyone. Sweep up dust and loose debris, check that nothing is left in cupboards or crawl spaces and clear safe access routes for tools and materials.
Then do a short handover. Share keys, emergency contacts and any special instructions. Take dated photos of each room so there’s a clear record of the starting condition. It’s useful if questions come up later.
If you’re planning to sell or rent the property after the renovation, keep all your records, receipts and photos together. They can help show buyers or tenants what was done and when.
Conclusion: A Good Clearout Sets the Tone for the Whole Project
Clearing a property before renovation isn’t glamorous, but it matters. A good plan, honest sorting, careful handling of valuables and waste, and a watchful eye for hazards all help the project start smoothly.
Start early, break the job into steps and ask for professional advice when something is unclear. When the builders arrive to a clear, safe, well-prepared property, you’ll be glad you did the groundwork.
Frequently Asked Questions
1. How early should I start clearing a property before renovation?
As early as you reasonably can. Many people start several weeks before the builders arrive, because sorting, selling, donating and arranging waste removal always takes longer than expected.
2. Should I hire a professional clearance company?
It depends on the size of the job, your time and your physical ability. For large volumes or heavy items, a licensed professional can save time and effort. Compare quotes and ask what’s included.
3. What should I do with furniture I no longer want?
You can sell it, donate it if it’s in good condition or recycle it where facilities exist. Items that are broken or unsafe may need to be disposed of through local waste services.
4. Do I need a permit for a skip or waste bin?
It depends on where you live and where the bin will be placed. If it will sit on a public road, local rules often apply. Check with your local authority before arranging it.
5. What if I find something unsafe while clearing?
Stop work in that area, keep people away and get advice from a qualified professional. This is especially important in older buildings, where some materials need special handling.